The start of this post was inspired by a few Windows Central posts spread over time, detailing some hacks and tweaks for Windows and Office users. It’s some quite useful stuff in everyday life, so I plan to update on this post regularly, citing more tweaks and hacks. Most of them will probably be Windows 10 related, and probably also recent builds of it. I’ve also started to date the posts (because some stuff outdates quickly) and I’m adding from the top.
Even more Windows 10 keyboard shortcuts [may 2020]
In fact; this is a very comprehensive list of just about all of them, as published on WindowsCentral.com, their Ultimate Guide:
Think you know ALL Windows 10 keyboard shortcuts? Find out in our full list
Think you know ALL Windows 10 keyboard shortcuts? Find out in our full list
In this guide, we’ll list all the best keyboard shortcuts that you can use to better navigate and utilize Windows 10 on your device.
Think you know ALL Windows 10 keyboard shortcuts? Find out in our full list
Some handy keyboard shortcuts for Windows 10 that we forget about too easily [dec 2018]
We all know (or at least should!) the most used keyboard shortcuts for working with any computer, like CTRL+Z to undo the last action, CTRL+C to copy an item, CTRL+V to paste something and so on… But there’s also a lot of keyboard shortcuts to work with Windows, that are a lot lesser known to the general public (at least from what I’ve seen in my daily practice). In this case you use the Windows key (you know, that key on the bottom left with that Windows flag logo on it) instead of the CTRL key to make the shortcuts. Here’s a few handy ones that will certainly speed up your poking around in Windows 10 PC’s 🙂 :
- Windows + E : opens Windows File Explorer
- Windows + I : opens Windows settings
- Windows + P : opens Projection settings flyout (to set if you want to duplicate or extend, etc)
- Windows + TAB : opens the Task View and Timeline (from Windows 10 v1803 and up). Task View shows a thumbnail view of all opened applications, and TimeLine is just below that, which shows your app and browsing history of recent days.
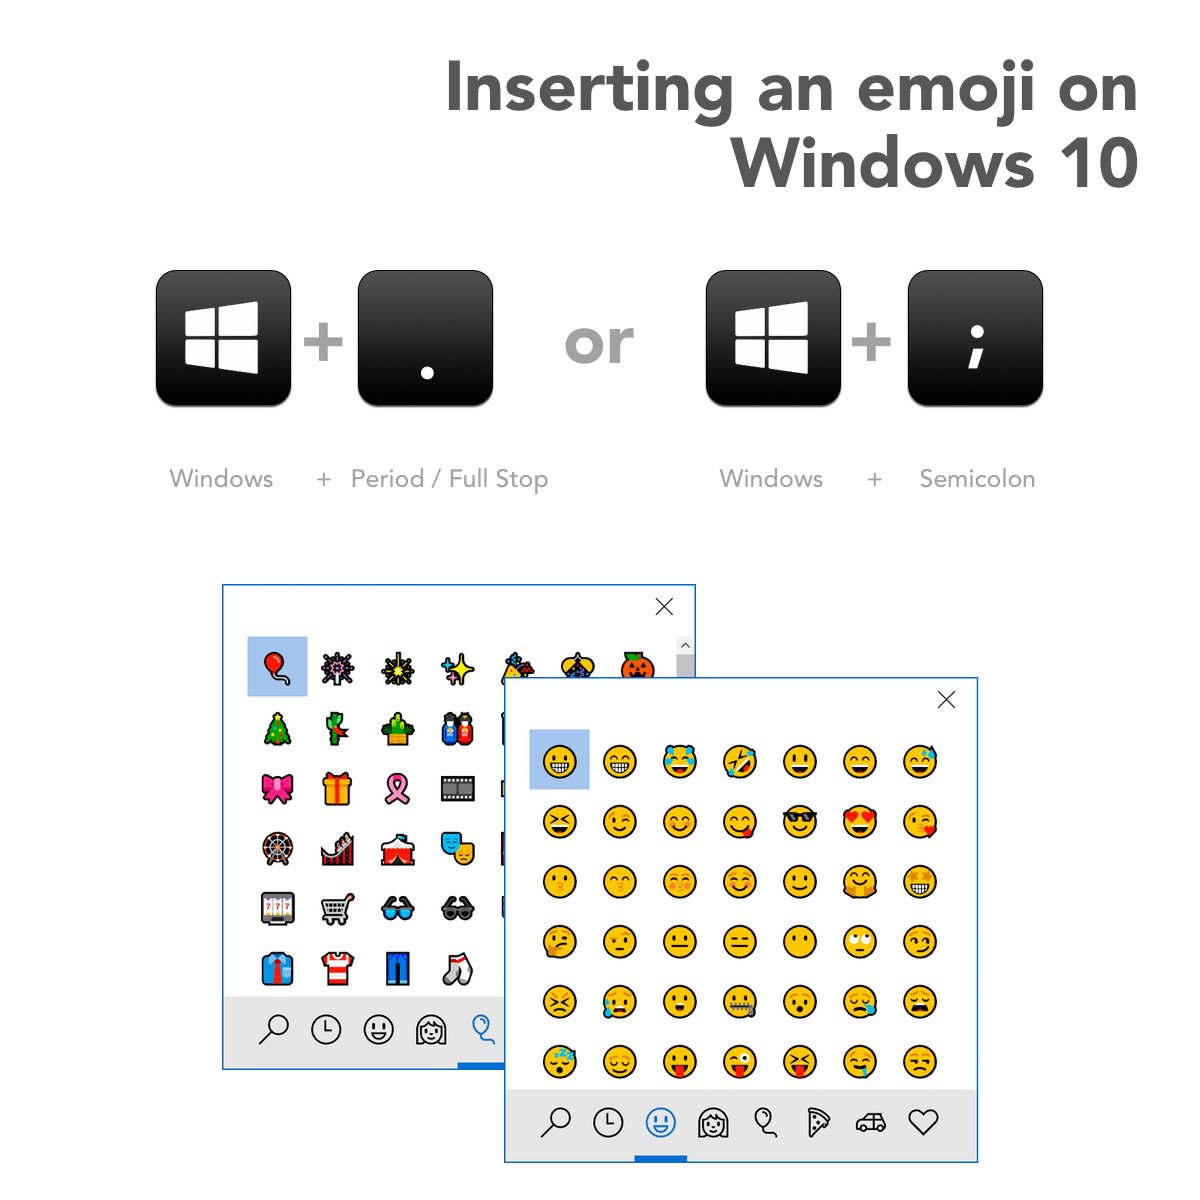
- Windows + . (or ;) : opens the Emoji Picker input panel
- Windows + A : opens the Action Center flyout (ie. where all your app notifications are)
Pro tip: when the Action Center flyout is open, hit the spacebar to expand or collapse the quick-action buttons. - Windows + S : opens the Windows Search flyout
- Windows + L : instantly Lock your PC (ie. puts PC on the login or lock screen)
- Windows + X : this opens the admin/poweruser menu with advanced settings like the device manager for instance. Right-click on Windows will als get you there.
For even more Windows kotkeys, check out this comprehensive list from Microsoft
And apart from these kotkeys, there’s a lot more to know about using Windows 10. For my dutch readers, here’s a good link with a lot of explanation of menu’s, where to find settings, etc:
101 tips voor de gebruikersinterface van Windows 10 (Start, tabletmodus, Win-X, Actiecentrum, Taakweergave)
101 tips voor de gebruikersinterface van Windows 10 (Start, tabletmodus, Win-X, Actiecentrum, Taakweergave)
Windows 10 gebruikersinterface: Start, desktopmodus/tabletmodus, tegels/tegelgroepen, Win-X menu, actiecentrum, taakweergave, taakbalk, zoekfunctie, Jump Lists, werkbalken.

Outlook (desktop) missing it’s flag and delete icons in the message listview? [dec 2018]
Another Office nuisance I ran into myself as well, is that since upgrading our work machines to Windows 10, and alongside it to a newer Office version (2016), these flag and delete icons at the end of each email in the listview had disappeared. Since I receive a ton of email all day, I needed that delete and flag icons back to be able to quickly handle my inbox. So I went looking on the web, and turns out this is caused by Outlook running in touch-mode apparently. So how does one get it out of this mode? I’m glad you asked… 😉
This screenshot shows you all you need to know:
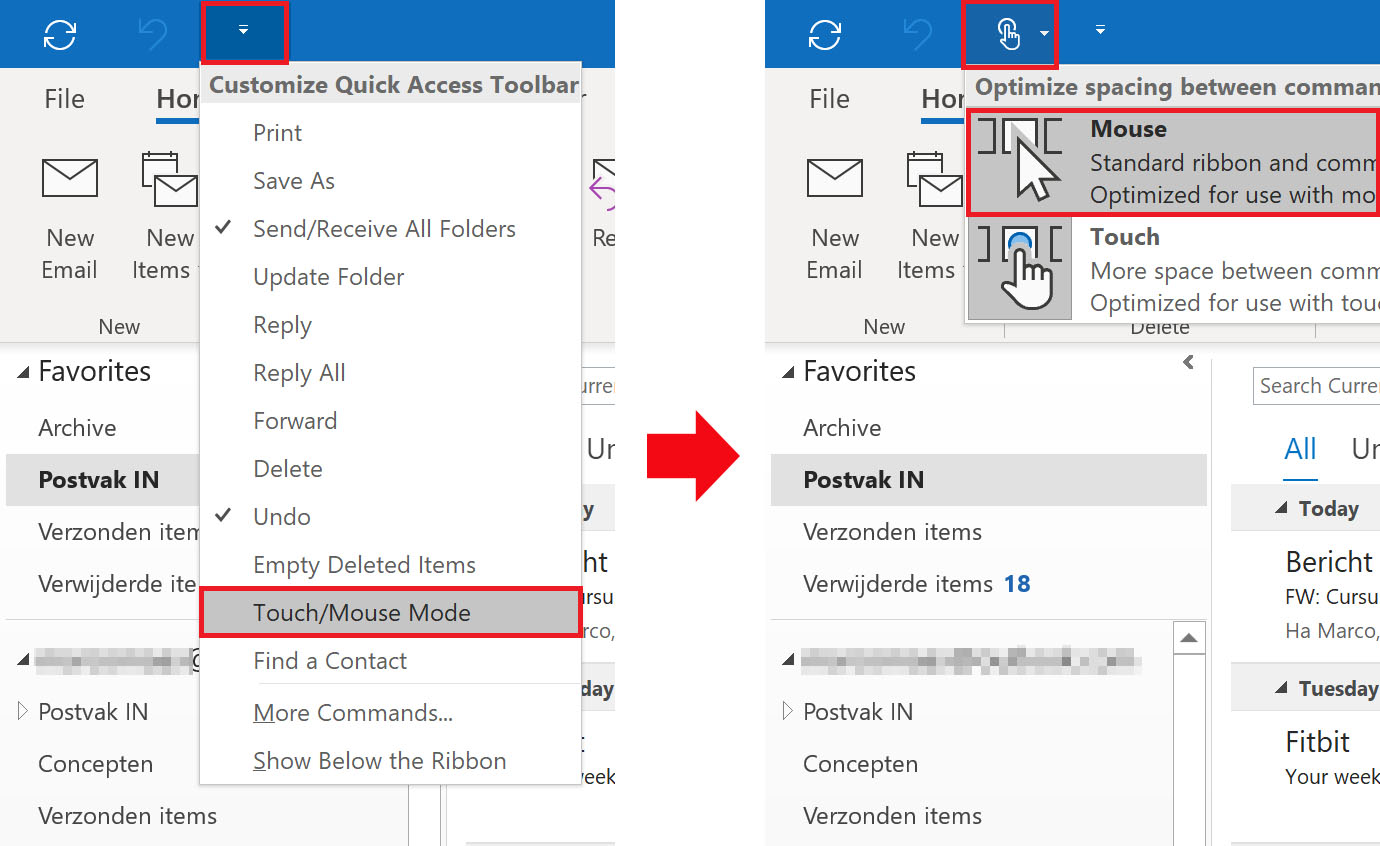
So: First you enable the menu for this touch/mouse mode toggle by clicking the very small arrow at the right end of all icons that are on the left of the so-called Quick Action Toolbar, which is the upper-most blue bar of the application. When you check of this option in the menu, you’ll have an option to toggle mouse or touch mode from the QAT as well 🙂
How to recover unsaved documents in Office [dec 2018]
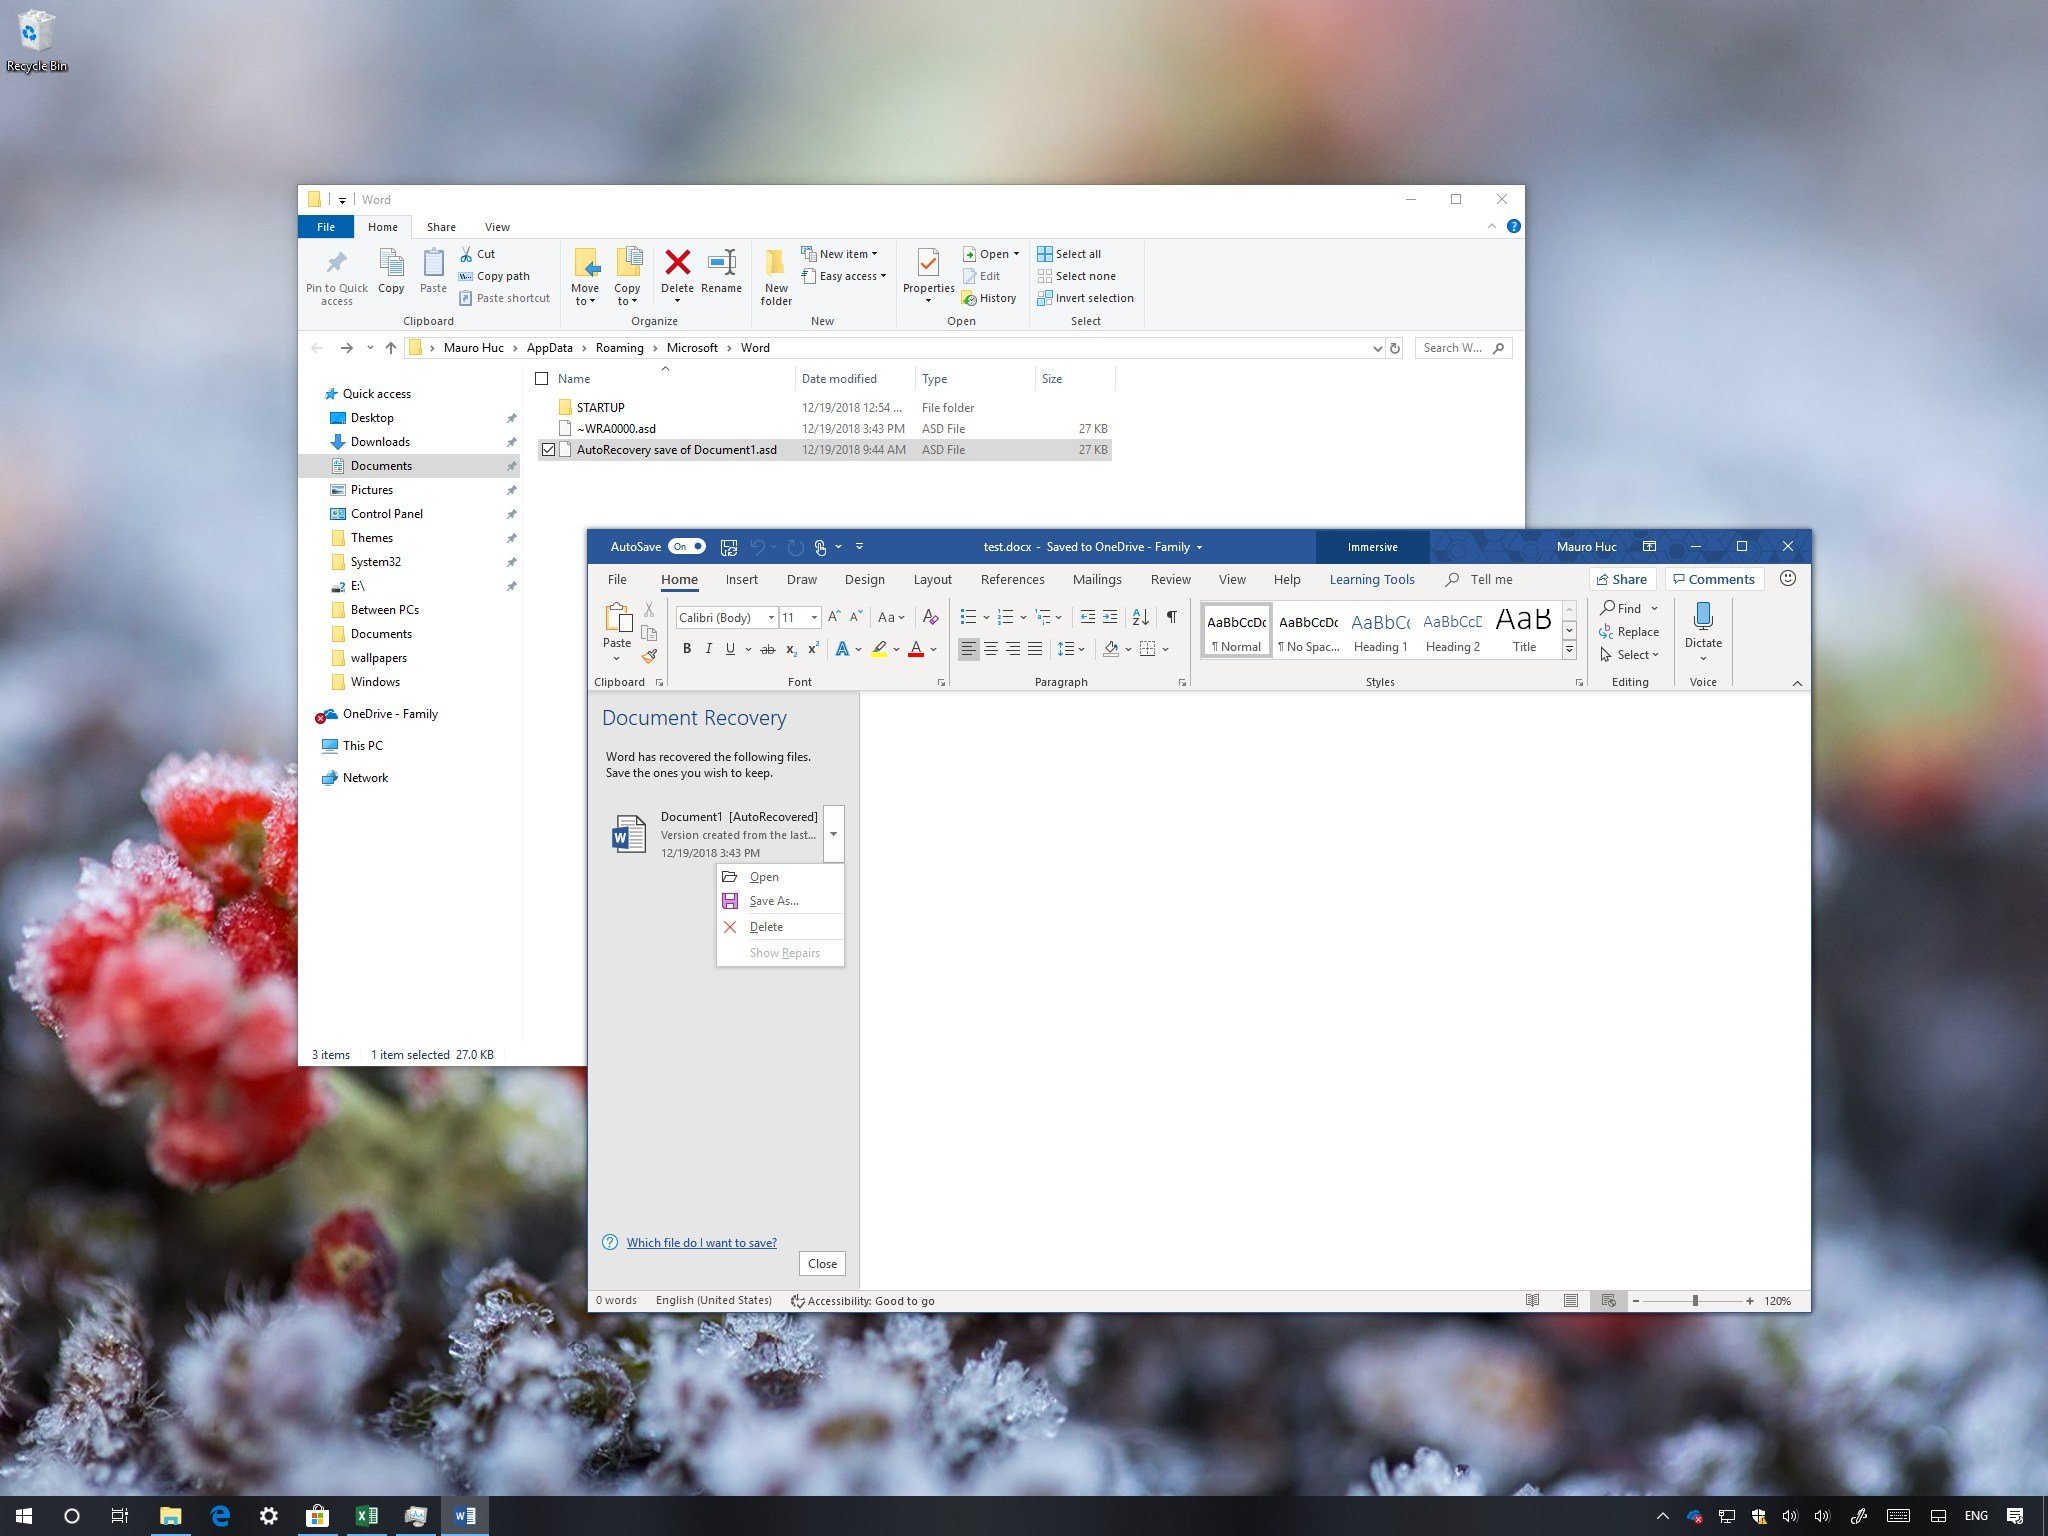
I get asked for this solution many times at work, but since I’m not really an Office-ninja (they hired me for the Sharepoint stuff), I had to look this up too. Furtunately, Windows Central wrote up a pretty lengthy post about this recently, discussing several different options for recovering unsaved Office documents, as well as discussing the option to disable the autosave features that make this possible in the first place, if you don’t like it. It’s a pretty comprehensive read, so go read it at WC:
How to recover unsaved documents in Office
How to recover unsaved documents in Office
In this guide, we’ll show you the steps to recover unsaved documents using the Microsoft Office apps, whether you’re using Office 365, Office 2019 or Office 2016.
How to Backup and Restore Start Menu Layout in Windows 10 [sept 2018]
This was a good find someday on twitter. It’s a post about how to backup your Tile layout of your Windows 10 Start menu, and of course: restore it. Just follow this link for the whole tutorial:
Backup and Restore Start Layout in Windows 10
Backup and Restore Start Layout in Windows 10
How to Backup and Restore Start Menu Layout in Windows 10
Get the ‘inverted theme’ for your mouse-pointer [july 2018]
Windows Central posted a complete tutorial about this, and I was awe-struck especially by the fact of “why didn’t I think of that?”. It’s about changing how your mouse-pointer looks on the screen. By default it’s a somewhat small-ish white arrow that moves at a reasonable speed across the screen on your mouse input. How this looks and feels however, is totally configurable under Windows, so apart from what I’m gonna show here, you can set a ton of other things too. Just take a good look around in these mouse settings.
Oh, and to be clear: this is showing the Windows 10 mouse settings screens of version 1709 (aka the Fall Creators Update). To get to these settings in in Windows 10 v1703 and before, you’ll likely have to look for the “additional settings” link in the top right of the Win10 Mouse settings screen, since Microsoft is still working on moving all ‘old’ control panel stuff into the modern Win10 style settings.
So, actually, the easiest way to get to this settings is by using the search bar on top in the settings panel (by the way, Win10 is full of search boxes; use them to your convenience!) by typing the ‘pointer’ keyword:

You choose the top option here (called ‘changing the mouse pointer colour’) and you’ll find that under Windows 10 Microsoft has actually put this under the ‘Ease of access’ options in the settings applet, and you’ll be taken to this exact sub-category of that. There are just a few things here, the top two being the most important: choosing the size of your mouse pointer, and -the one we’re after- the colour of the mouse pointer. The icons themselves are pretty self explanatory, and we’re looking for the most right one here, with the pointer always asuming a contrasting colour. So it will show up white on dark backgrounds and black on very light backgrounds, and you’ll always be able to distinguish where your pointer is on the screen…

How to enable the Emoji Picker on non-US keyboards [july 2018]
Another tip here to make life easier, is the new Emoji Picker that was first introduced in Windows 10 v1709 (aka The Fall Creators Update) which you can call upon by pressing WINDOWS + . or ; (period or semicolon). Sadly however, due to Microsoft completely overhauling the soft-keyboard experience in Windows 10 based on a totally new XAML layout, they had only localised it for US usage with the v1709 release (which you could argue, is not what they promised). Anyway, this is what we’re looking to enable:
Update: We’ve moved quite a few builds now, and the emoji-picker is now available broadly without needing this registry-hack since the Windows 10 v1803 build and higher.
Original item continued:
Of course there’s always techies on the web diving into cases like this and someone came up with simply changing a registry key to enable the Emoji Picker on every other system locale out there. But before you get to tweaking the registry, there’s two things you must observe.
First; messing with the registry can be tricky and can potentially bring down your system down if you f*** up 😉 , so make sure you follow instructions to the letter, and back up your registry before tweaking it (if you want to be completely safe here).
Second; it’s important to point out that Microsoft didn’t rollout the Emoji Picker to all languages for a good reason. The Emoji Picker features a keyword search (like for instance “sad” will show all sad Emojis), and this currently only works in the US system locale and will probably give weird result in other languages after this ‘hack’.
Now that’s out of the way; here we go… 🙂
- Open de registry editor in Windows 10 by clicking in the Search/Cortana area and start typing ‘regedit’.
- In the results the item ‘regedit’ should appear, accompanied by a boxy blue icon and the line below: “run command”.
- Right-click ‘regedit’ and run it as an Administrator.
- Now navigate to this section of the registry:
Computer\HKEY_LOCAL_MACHINE\SOFTWARE\Microsoft\Input\Settings
- Inside this settings folder right-click on a blank area, and select “New > DWORD (32-bit) value”
- Name this new DWORD key:
“EnableExpressiveInputShellHotkey” (without the quotes of course)
- Now set it’s value to “1” (Hexadecimal). You do this by doubleclicking the key you just created.
- Save the new key with its value by clicking OK.
- Reboot computer to have the changes take effect.
Well, that was all, and you’ll now be able to use the Emoji Picker 🙂
Source: Windows Central